This is part II of a two-part post in which I will walk you through some key parts of a technically-savvy user’s long-term literature review and maintenance strategy.
In part I you learned to
- take notes while reading that won’t get lost or damaged by your software,
- organise notes and annotations so you won’t forget why you took them,
In this section, you will learn how to:
- maintain associated bibliographical records,
- use Docear in a way that will keep your literature reviewing current for years to come.
Warning: long post, so here’s a table of contents:
First, Import your annotations into Docear to manage them
So far, this guide has given you some pretty generic advice about note taking, you could use it in any piece of software. The Docear-specific pay-off for this process comes when you import your PDFs into Docear: you can use Docear’s internal scripting language (well, FreePlane’s version of Groovy) to format, re-organise and label your new annotations automatically. I have some complicated scripts that I won’t cover here, but here’s a very simple one I use to automatically apply visual labels to my annotations.
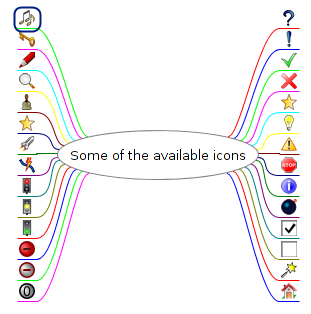
Docear offers a number of visual labels you can use to decorate the nodes in your maps, to make them visually appealing and easily distinguishable:

I have written a script that looks for all annotations beginning with ‘idea’, or ‘ref’ or ‘term’, and allocates them one of a number of pre-set visual labels provided by Docear.
// @ExecutionModes({ON_SELECTED_NODE, ON_SELECTED_NODE_RECURSIVELY})
if (node.text.toLowerCase().startsWith("todo")) {
      node.getIcons().addIcon("checked")
} else if (node.text.toLowerCase().startsWith("idea"))  {
      node.getIcons().addIcon("idea")
} else if (node.text.toLowerCase().startsWith("ref"))  {
      node.getIcons().addIcon("attach")
} else if (node.text.toLowerCase().startsWith("question"))  {
      node.getIcons().addIcon("help")
} else if (node.text.toLowerCase().startsWith("q:"))  {
      node.getIcons().addIcon("help")
} else if (node.text.toLowerCase().startsWith("quote"))  {
      node.getIcons().addIcon("bookmark")
} else if (node.text.toLowerCase().startsWith("note"))  {
      node.getIcons().addIcon("edit")
} else if (node.text.toLowerCase().startsWith("term"))  {
      node.getIcons().addIcon("desktop_new")
} else if (node.text.toLowerCase().startsWith("crit"))  {
      node.getIcons().addIcon("pencil")
}
To install this script, I wrote this code to a file called addiconNodes.groovy, which I then put it in my /home/saul/.docear/scripts directory (NB: the location of this directory may vary on Mac/Win). Docear also has a built-in script editor you can use to write groovy scripts. The script then becomes available as a contextual menu item.
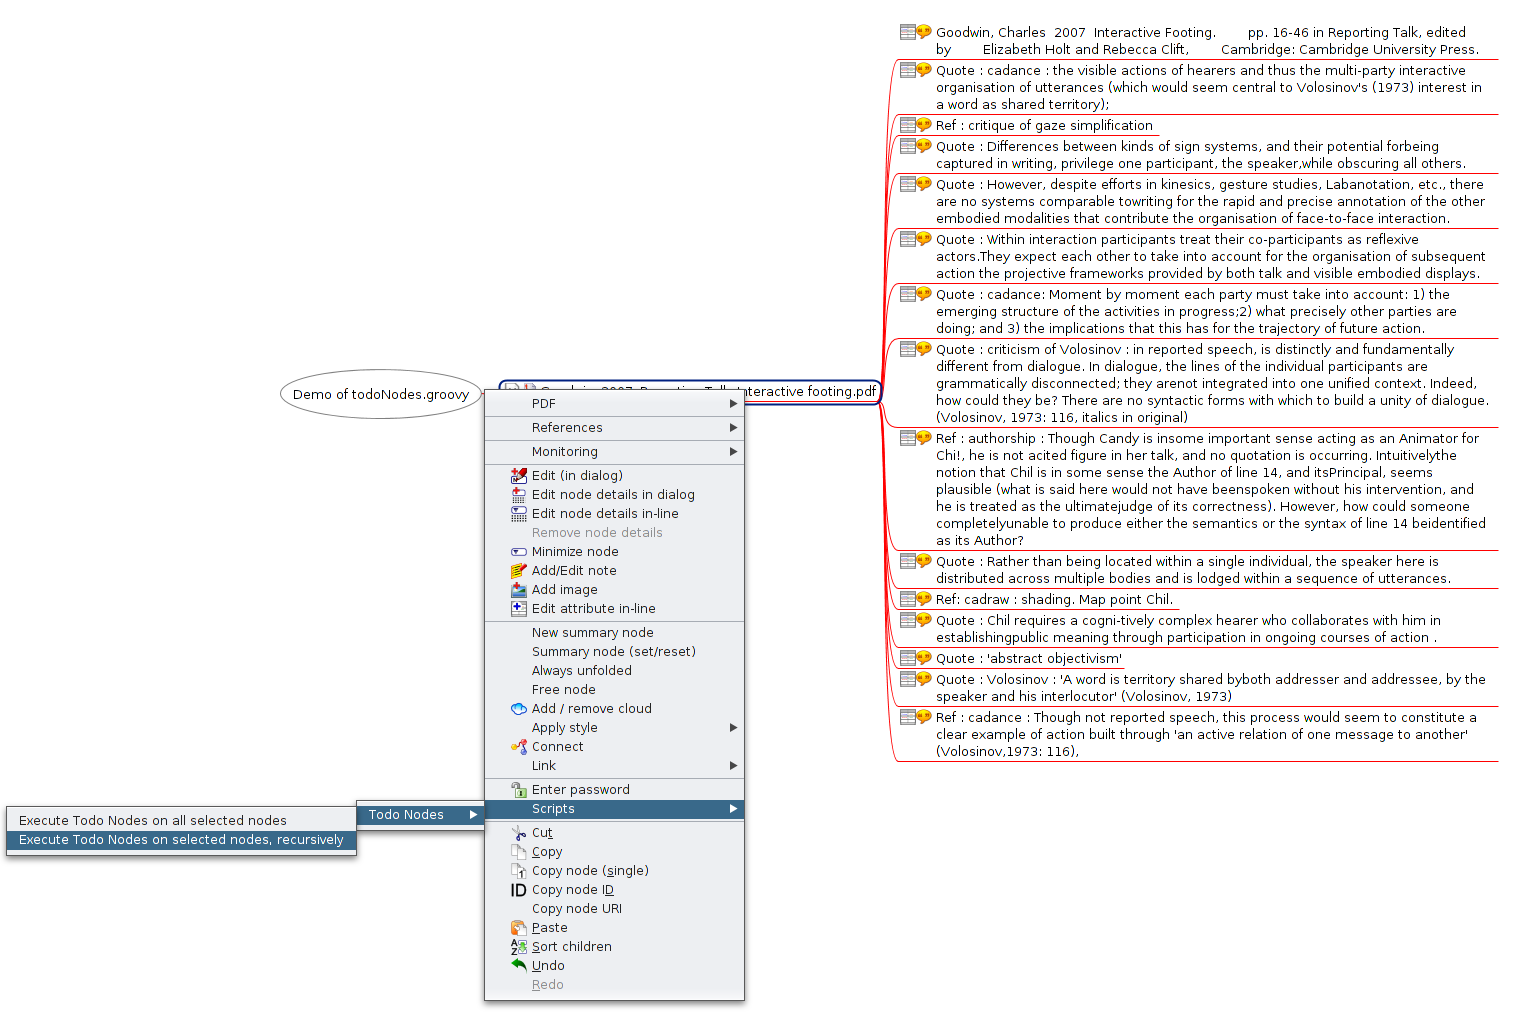
Here are some illustrations showing the script being run on a newly imported paper:

Selecting the script option in Docear:

What it looks like when the script has run finished:

And how you might then choose to organise your annotations:

You’ll find lots of Freeplane scripts you can modify and play with here – there are some amazing possibilities – the icons script above doesn’t even begin to scratch the surface of what this method could do for your literature reviewing process.
Using Docear to manage thousands of papers across multiple projects and multiple years
Docear’s demo shows someone writing a paper with about 20 or 30 references. This is fine for one project, but I have over 3000 PDF books and papers in my literature repository. Over the years, I suspect this will continue to grow. I want to feel secure that my library of research papers, annotations and references is in one safe location on my hard drive. I also don’t want to have to duplicate those PDFs each time I start a new project. Here are some of my solutions to these issues geared towards a long-term research strategy.
First: a geeky caveat
Having recommended Docear for the approach outlined so far, there are some problems with Docear that I think you will have to address if you are really going to use it for a long-term research and literature management strategy.
If you think you might just use it for a masters-level one year project, the rest of this guide probably isn’t necessary. If you want to read your way into and stay up to date with the vast literature of one or more academic fields long-term, read on, but be warned: it gets even more geeky from here on in.
Docear’s default per-project folder structure and its problems
At the moment Docear encourages you to store your PDFs on a per-project basis, as if you were starting from literature year 0 each time you write something. Also (by default, at least) it puts them in a rather obscure folder structure. I don’t really trust myself to reliably back-up obscure folder structures.
Here’s how Docear does a default file structure for a demo project I just created
/Home
    /Docear
            /projects
                /Docear demo
                    /_data
                        /!!!info.txt
                        /1493C9745013F2UNMIV1XCU93LBPZ4Y0KU14
                            /default_files
                                /Docear demo.bib
                                /literature_and_annotations.mm
                                /temp.mm
                                /trash.mm
                            /My Drafts
                                /My New Paper.mm
                            /settings.xml
                    /literature_repository
                        /where_I_am_expected_to_put_my_pdfs.pdf
                        /Example PDFs
                            /Docears_sample_PDFs.pdf
                    /Project Data.mm
The idea from Docear’s developers here is that you get a few files by default when you start a new project including a dummy ‘My New Paper.mm’ (.mm stands for Mind Map) , a project-name.bib file and a literature_and_annotations.mm file, and a folder to hold all the PDFs you’ve associated with this project..
The literature_and_annotations.mm file contains a script that – when you open it – will scan through this project-specific literature_repository and check for updated files or new annotations.
This creates several problems:
- Docear’s structure works fine for a per-project use, but I have 9GB of PDFs, I do not want to wait for Docear to scan through those and check for updates every time I start it up.
- I’d rather not store all my precious PDFs with thousands of hours-worth of annotations 5 levels down an application-specific folder hierarchy that I may or may not remember to transfer to a new machine. Similarly, I don’t want my references – which may have taken a long time to assemble stored in a folder handily called ‘1493C9745013F2UNMIV1XCU93LBPZ4Y0KU14’.
- I want to be able to use PDFs and bibliographic data from all my previous projects in new projects easily.
Work-around 1: consolidating your literature archive
Use a ‘main_literature_repository’ for your key files
- I create a ‘default’ project into which I first import for all my PDFs and references
- I set up this project to store PDFs in a folder in my Dropbox called main_literature_repository.
- I put the main BibTeX file for this project in the same folder.
This means I have one canonical BibTeX file with all the books and papers I will ever import in my main_literature_repository folder – this makes it easy to back up. I use Dropbox to keep rough versioning for me in case I do something silly or lose my machine/s – use your backup strategy and folder location of choice.
Use a per-paper mind map for long-term annotation and re-annotation
I delete the literature_and_annotations.mm file from my default project. I do not want to wait 3 hours while Docear scans through all 9GB of my papers when it starts up. Instead, in the same main_literature_repository folder, I create a per-paper mind map.
I do this because I may use a paper six times in six different paper/research contexts. Ideally, I want to be able to read and re-read it, and keep track of what interested me about it and when… not have to delve into each project I used it for.
So, once I’ve done my annotations, I create a new map in my default project, I import the PDF, copy and paste the title of the PDF and use it to name the new mind map identically to the paper, so that in my main_literature_repository folder I have:
/home
    /saul
        /literature_repository
                /my_new_favourite_paper.pdf
                /my_new_favourite_paper.mm
Apart from anything else, I can glance through the folder listed alphabetically and see which papers I have actually read! Now every time I update my annotations in that paper, I can import them into this paper-specific map, and organise them.
I might want to do this in a number of ways (one big list, thematically etc.) but I usually organise them to show how they relate to the project I’m currently working on. If I read that paper three or four times, and each time I organise the new annotations in this way, after six or seven readings/uses of that paper it’s going to be interesting to be able to see how my use of this paper has changed over time.
A quick example of importing a paper:
I download a paper helpfully entitled: ‘12312131231512312313.pdf’ from a publisher. I re-name it something useful (e.g.:AuthornameYYYY-title.pdf)2, and put it into my main_literature_repository folder, using Docear or Jabref to add or automatically import its bibliographical record into my default project BibTeX file. Once I’ve read it and taken notes in annotations, I manually create a new map just for this paper in the same main_literature_repository folder. This is now the mother lode folder with all my really important work in it.
Work-around 2: using your papers across multiple projects
This bit is kind of tricky and involves many trade-offs, I think Docear will fix it some day, for now, this is how I am doing it.
I create a new project, and treat it as a ‘sub-project’ of my default project
When I start a new Docear project, I let Docear create a default folder structure something like the one above. To get literature from my main_literature_repository folder into this new project, I create symbolic file system links to the relevant PDF files in my main_literature_repository in the new sub-project-specific literature_repository folder.
So the original PDFs live here:
/home
    /saul
         /literature_repository
                    /my_new_favourite_paper1.pdf
                    /my_new_favourite_paper2.pdf
                    /my_new_favourite_paper3.pdf
                    /my_new_favourite_paper4.pdf
I create a new Docear project and create symlinks (only for the relevant PDFs) here:
/Home
    /Docear
            /projects
                /Docear demo
                    /_data
                        /!!!info.txt
                        /1493C9745013F2UNMIV1XCU93LBPZ4Y0KU14
                            /default_files
                                /Docear demo.bib
                                /literature_and_annotations.mm
                                /temp.mm
                                /trash.mm
                            /My Drafts
                                /My New Paper.mm
                            /settings.xml
                    /literature_repository
                        /link_to_my_new_favourite_paper1.pdf
                        /link_to_my_new_favourite_paper2.pdf
                        /link_to_my_new_favourite_paper3.pdf
                        /link_to_my_new_favourite_paper4.pdf
                        /Example PDFs
                            /Docears_default_sample.pdf
                    /Project Data.mm
Now if I open my literature_and_annotations.mm file in the new sub-project, it will import these new PDFs and their associated annotations and I can start working with them. Of course any changes to annotations I make in these maps will also change annotations in the original PDFs.
Maintaining bibliographical references across Docear projects (and other software)
The only issue with this approach so far is that your new project-specific BibTeX file will not automatically import metadata from your ‘default’ project. This means that when you import your PDFs into this new project’s literature_and_annotations.mm map, they will have no bibliographical reference data attached.
To understand why – and how to solve it – you need to know a little bit more about how Docear works:
Docear allows you to re-organise your annotations while maintaining their associations with the bibliographical reference of the paper they’re drawn from by linking nodes in your Mind Map (.mm) files to PDFs referenced in your BibTeX file. Docear does this by adding a ‘file’ BibTeX field entry for each paper. Here’s an example of a BibTeX entry from my databse:
ARTICLE{Hepburn2012,
  author = {Alexa Hepburn and Sue Wilkinson and Rebecca Shaw},
  title = {Repairing self- and recipient reference},
  journal = {Research on Language and Social Interaction},
  year = {2012},
  volume = {45},
  pages = {175-190},
  number = {2},
  file = {:/home/saul/main_literature_repository/hepburn_repairingselfand_2012.pdf:PDF},
  keywords = {EMCA, Self-reference, Reference ; Repair},
}
So when Docear scans this PDF, it extracts its annotations, places them in the map, and creates a hyperlink to the PDF listed the file field. This means if I click on the node, it opens the file. Docear also extracts the bibliographical information from this BibTeX reference, and then adds them as attributes of the associated annotation node on my map.
So, when I create a symbolic link to this file in my new sub-project, Docear sees it as a new PDF, namely:
/home/saul/Docear/projects/sub-project-title/literature_repository/hepburn_repairingselfand_2012.pdf
But it doesn’t have any BibTeX data in this new project, so it won’t recognise this PDF and paste in associated bibliographical data.
To solve this issue, there are several possible solutions:
- Sym link your ‘default project’ BibTeX file into each new sub-project using a symlink – just like you do with your PDF files.
- Duplicate your ‘default project’ BibTeX file into each new sub-project, search/replacing the ‘file’ field of each entry to point to your new sub-project’s literature_repository folder.
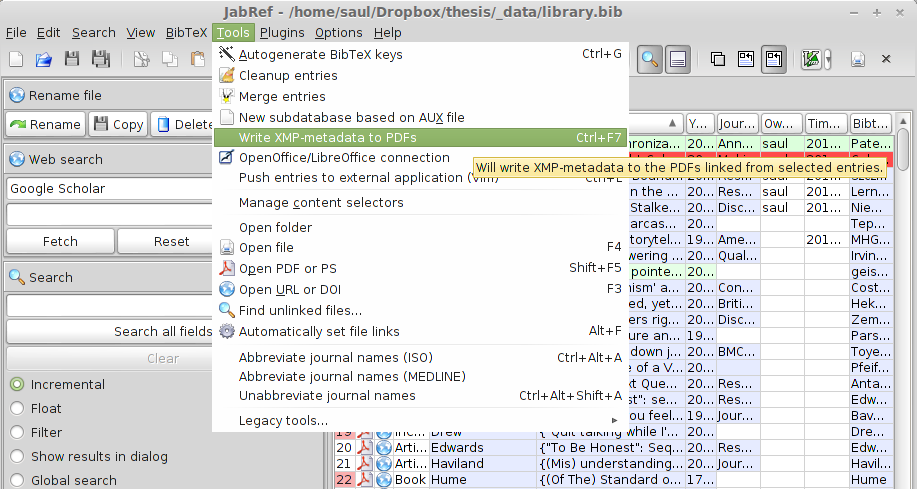
- Or, (and this is what I do), open your main BibTeX file in a recent, stand-alone version of JabRef and use the ‘write XMP data’ option to make sure that the PDFs themselves contain their own reference data. When you import these PDFs, you can then use the reference embedded in the PDF itself to create a new and separate project-specific BiBteX file.
JabRef’s XMP writing option:

This third option is preferable to me for several reasons:
- I don’t want to see all my references in every new project – it’s distracting.
- XMP data can be read by lots of other bits of software so it makes my reference library somewhat more portable. Also, if I lose my BibTeX file in some catastrophic data loss episode, as long as I have my PDFs with XMP bibliographic data I can pretty much reconstruct my literature, annotation and reference archive from just those files.
- I may want to update my bibliographical records for a new project, but keep the references of older projects intact. Although I’m aware that I improve my bibliographies continually and incrementally, I really want to control how I change them. For example, if I continually use my default project BibTeX file, symlinked in to each new sub-project as in option 1, I may not be able to re-generate a paper I wrote three years ago before I made those changes and improvements. I really want that paper to be re-created exactly as it was when I wrote it, including all the reference details and errors. I can always update an old BibTeX file from an old project easily – because the PDF file itself now contains the latest up-to-date XMP data.
I see this feature of the latest, stand-alone version of JabRef (not available in Docear’s embedded version of JabRef) as a significant plus in terms of the sustainability of this approach to literature management.
Things I didn’t cover but may post about in the future
There are lots of other things you can do using this approach to Docear – and Docear’s approach in general, a few I can think of that I didn’t cover are:
- Using the command line to search/filter your annotations.
- Using recoll, spotlight or similar configurable full text search systems on your repository.
- Importing folder structures containing other research materials into your map.
- Using Docear (or freeplane) to take detailed and well structured notes during lectures.
- Using Docear to manage and search Jeffersonian transcripts of conversational data.
If you have any questions or would like to hear about these, drop me an email or get me on @saul
Notes
- ^ Because I like small tools for simple jobs, I actually do this using JabRef in stand-alone mode, along with JabRef’s rename files plugin to do this automatically and configurably. NB: Docear will do this automatically in upcoming versions – the feature is already in there, just not quite ready yet.


